Introduction – continuous deployment with Azure Bicep
Continuous deployment with Azure Bicep using Azure DevOps provides a streamlined approach to deploying your resources. This method leverages Infrastructure as Code, harnessing the power of Azure DevOps tools such as source control, Azure Pipelines, and Azure Artifacts, all while maintaining environment control and auditing.
In this article, I aim to walk you through a reference method for the continuous deployment of your Bicep templates using Azure DevOps. I will also share insights into the decisions made during this process.
Subscription scope
Before we delve deeper into this post, I’d like to highlight that this setup is based on a Bicep deployment scoped at the subscription level. I personally prefer this approach whenever possible for resource deployment, using modules to narrow down to resource group deployments as needed.
This strategy eliminates the need to juggle different CLI cmdlet logic and deployment scopes for the pipeline (e.g., between ‘az deployment sub create’ and ‘az deployment group create’). It also allows for the deployment of a broader range of resources, such as policy, RBAC, subscription budgets, etc.
For those who may not be aware, you can use module scopes to ‘scope down’ to the level you require, keeping the deployment command consistent. For instance, refer to the ‘scope:’ section for what I’m alluding to:
using 'main.bicep'

// Hover over the param to see their descriptions pulled from the main bicep file
param location = 'uksouth'
param rgName = 'example-rg'Obviously this means management & tenant level resources are out of scope for this example.
Azure DevOps Setup
Prerequisites
Create a new workload identity federation service connection
You may already have these set up, in which case you can ignore this. However, I strongly recommend using a workload identity federation service connection, as it offers a great deployment identity option with increased security and secret-less management.
Git Repository Structure
For this blog post we’re following a fairly simplistic GIT repository structure with a Bicep folder and a singular main.bicep file that contains all our resources for our application/project which is a fairly common setup for an application deployment.
This may look like this:
using 'main.bicep'

// Hover over the param to see their descriptions pulled from the main bicep file
param location = 'uksouth'
param rgName = 'example-rg'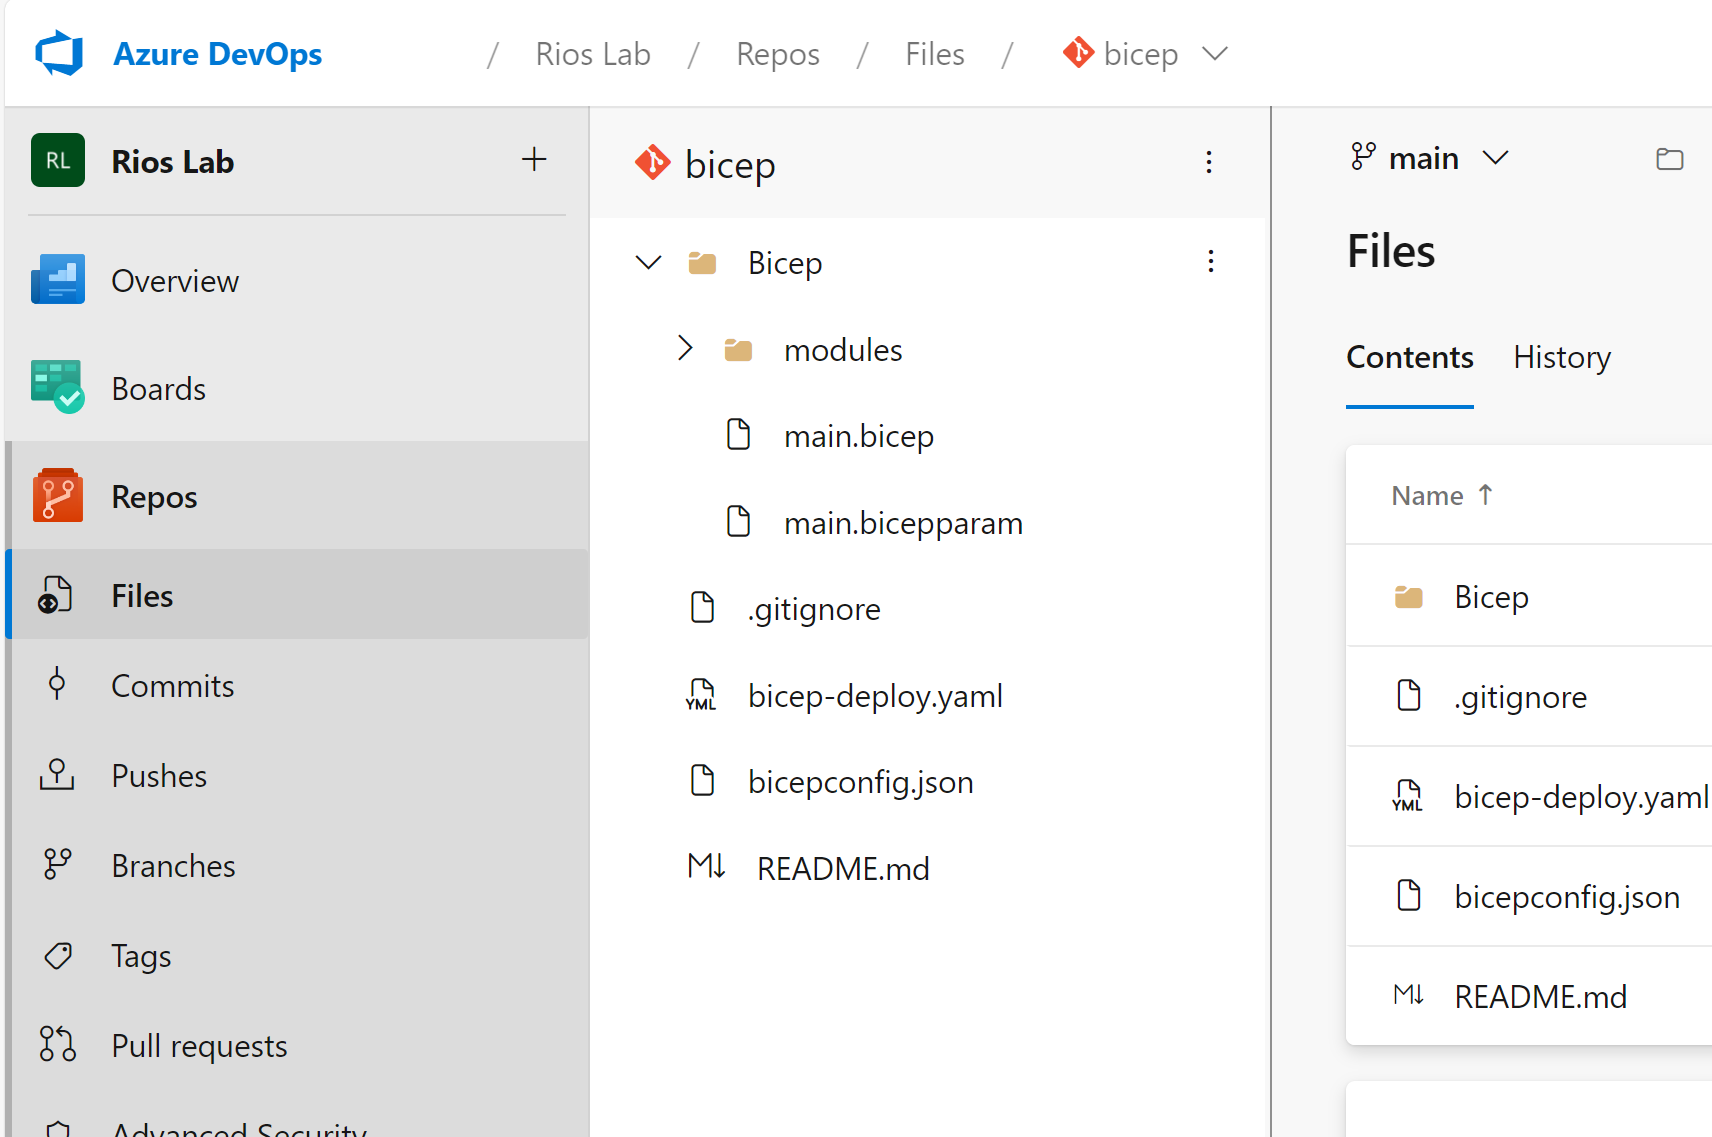
If you want an example Bicep file to demo this, you can use these as an example:
main.bicep
using 'main.bicep'

// Hover over the param to see their descriptions pulled from the main bicep file
param location = 'uksouth'
param rgName = 'example-rg'main.bicepparam
using 'main.bicep'

// Hover over the param to see their descriptions pulled from the main bicep file
param location = 'uksouth'
param rgName = 'example-rg'Azure DevOps Environments
A key aspect of any process is ensuring that you have the appropriate controls and safeguards in place for production deployments. A part of this process involves Azure DevOps environments. Not only will you be able to get a historical audit of each pipeline deployment to production, but you can also set specific approvals and checks in place before the stage can run.
- In Azure DevOps, navigate to your Project. Under Pipelines, select Environments, then New environment, and finally, select ‘production’.
- Once created, go to the ‘Approvals and checks’ tab and select ‘Approvals’ from the ‘Add your first check’ option. Here, you can add individuals or groups.
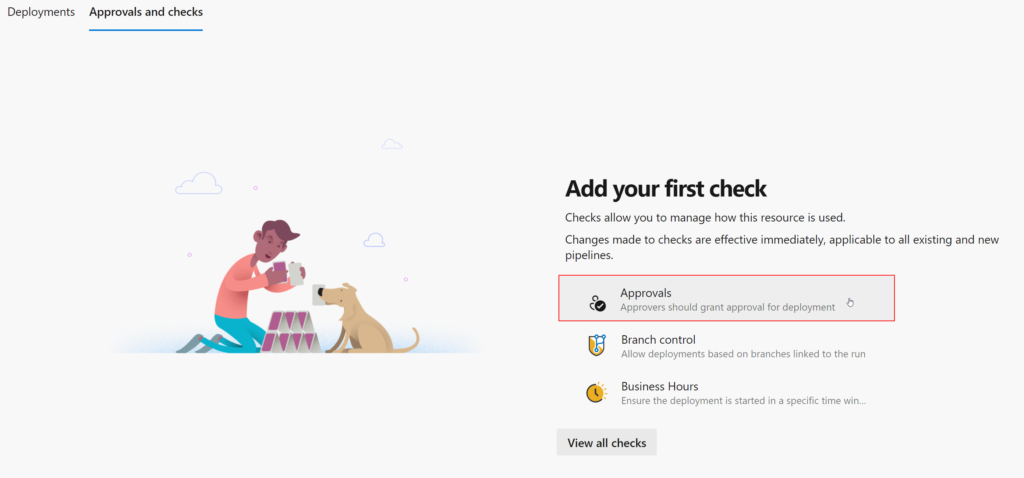
To expand on this, there are a lot of excellent checks you can introduce. Although they’re not in the scope of this particular post, you can browse them and see if any fit your use case. For example, you might want to limit deployments to your organisation’s business hours.
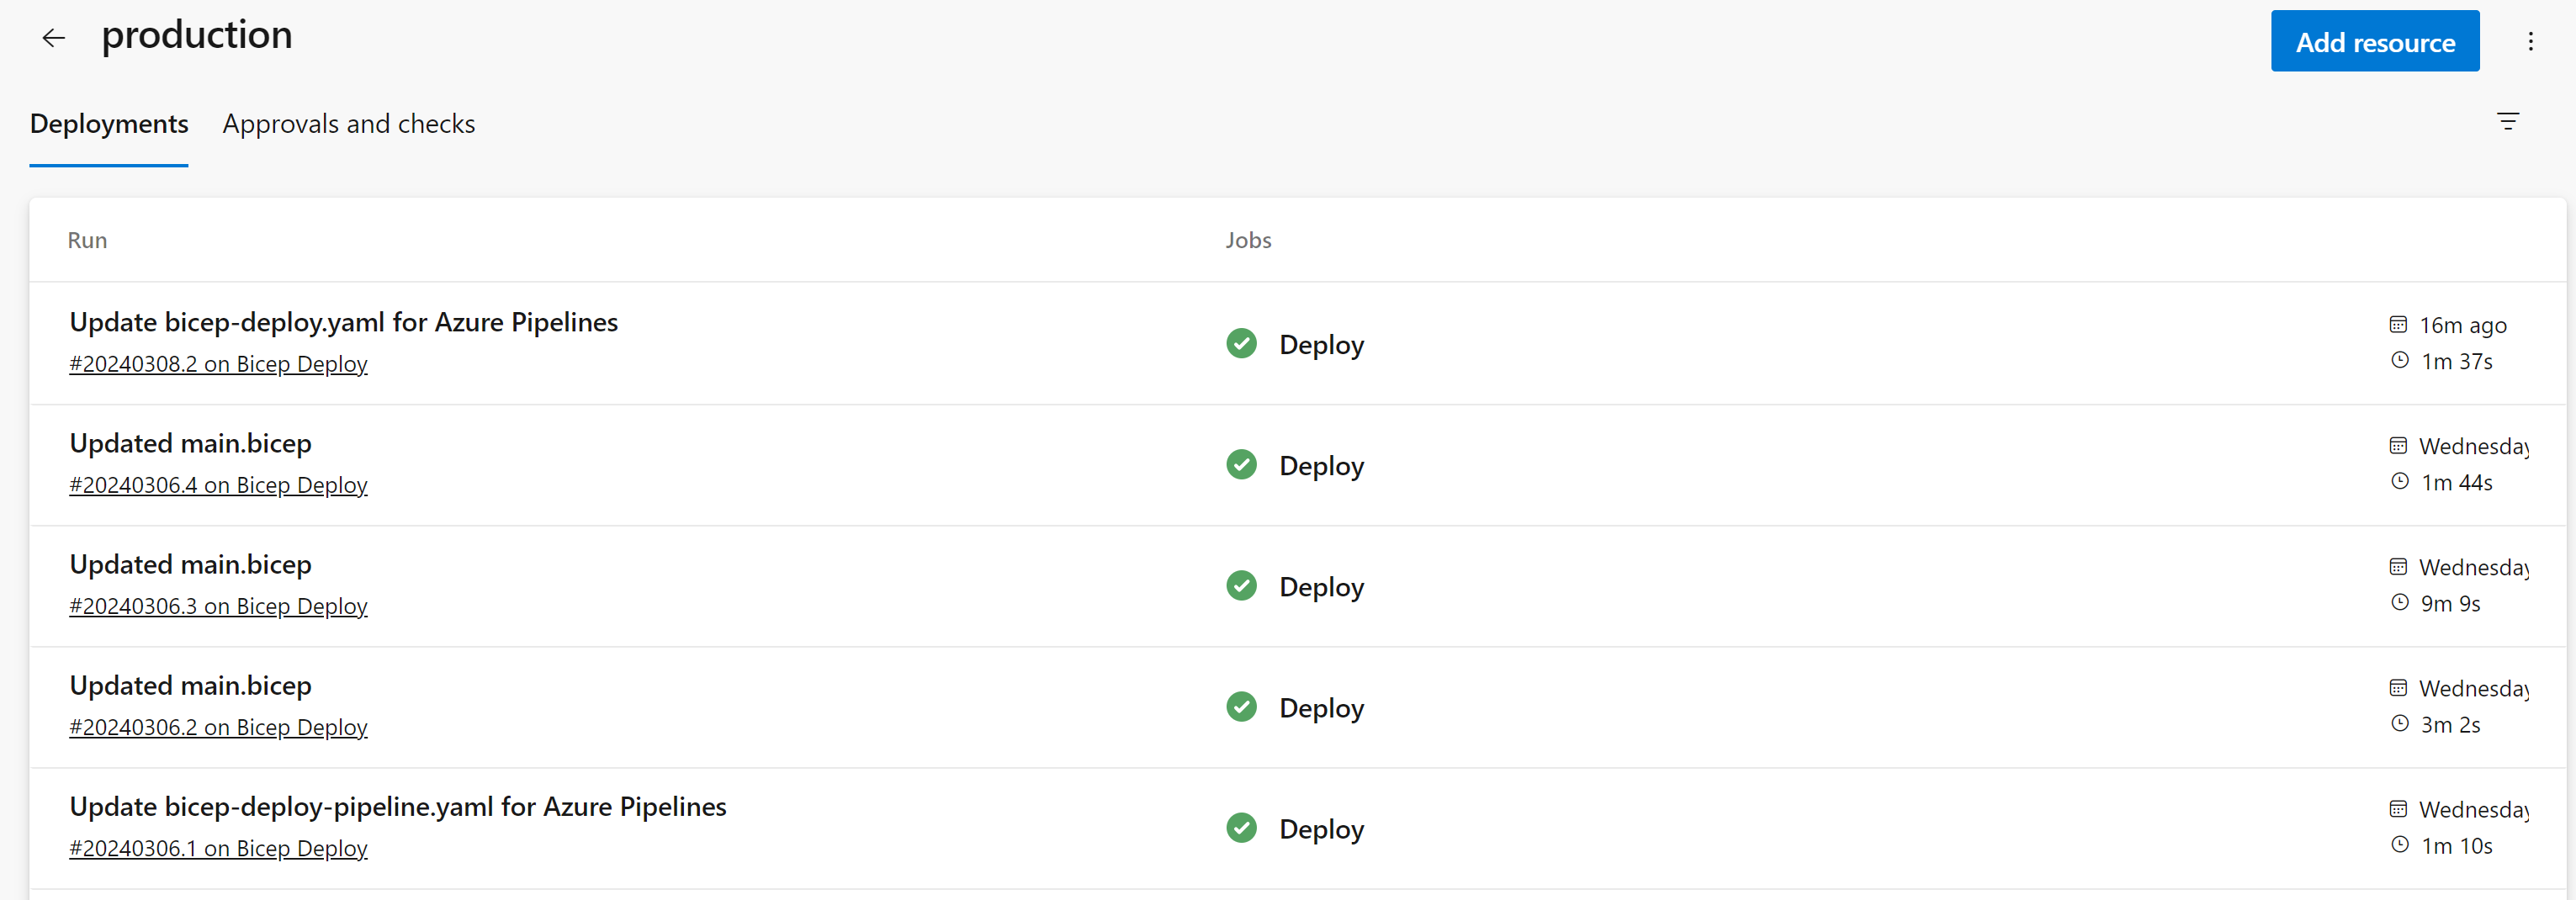
In addition, once you’ve started deploying using the environment (after the steps below), you’ll be able to view all historical runs. This includes changes from a source control perspective and any linked work items associated.
Azure Pipelines – Deployment
Next up is the actual release pipeline itself. YAML has become the recent standard practice for all DevOps pipelines, so this will be no different. It allows the pipeline to be within source control, which is an added benefit, and also enables pipeline templating as you expand and standardise pipelines.
- Create a new file in your Git repository with the extension ending in .yaml or .yml. This can be in the root or within a dedicated pipelines folder, depending on your preference.
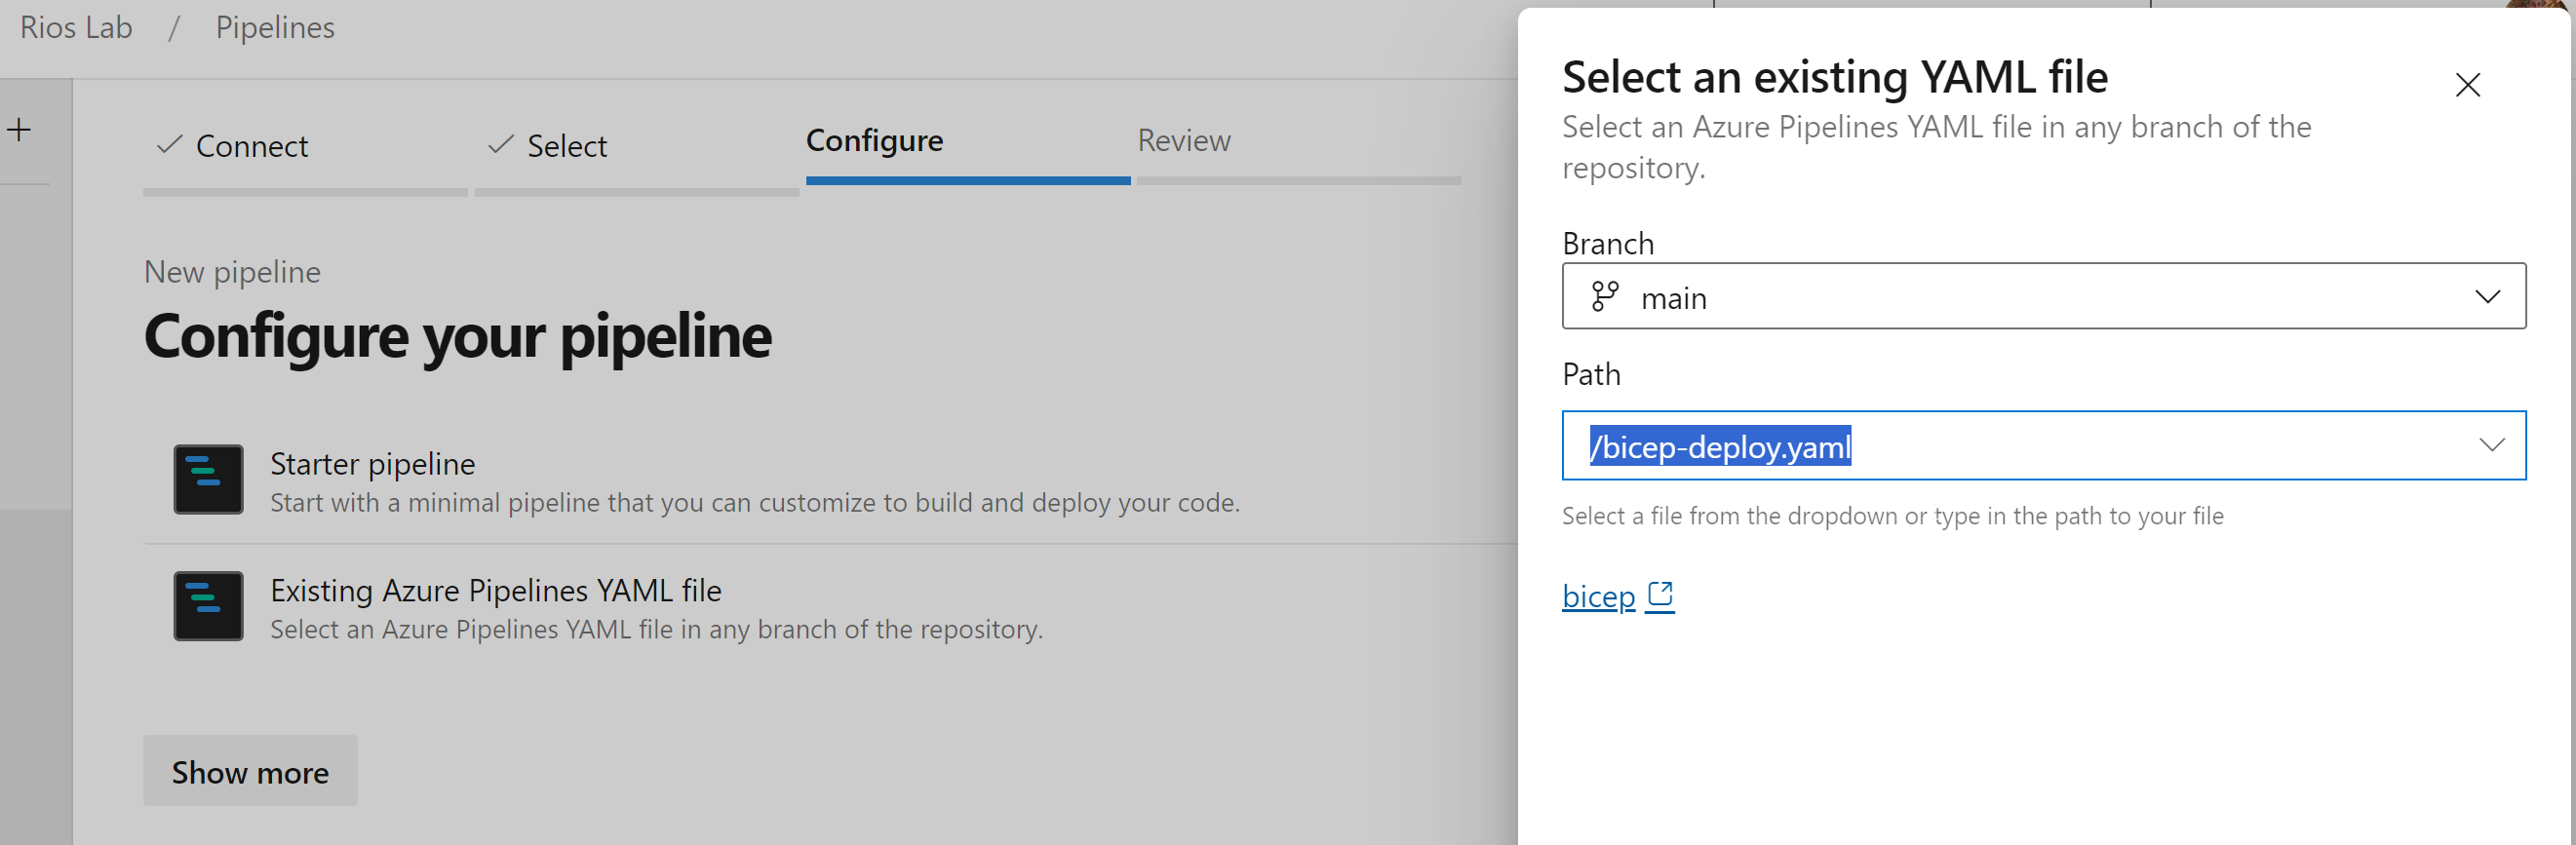
- Once created and committed into the main branch, you need to create a new pipeline:
Pipelines > New pipeline > Azure Repos Git > Select your repository > Existing Azure Pipelines YAML file > Save (under the down arrow on the Run button).
For my Azure Bicep pipelines, I do tend to favour Azure CLI over built-in tasks for the most part, as a personal preference. I know many who utilise the ARM template deployment tasks and others, but I like the control and replicating how I would deploy locally in a pipeline as it makes it consistent and easier to troubleshoot issues.
Bicep Deployment YAML
Here’s the Bicep Deployment YAML example that you can copy, paste, and customise as you see fit. It’s been created as a reference for you to pick up and get started. It will work from day one and also serves as a good starting point to understand the flow. This allows you to expand it, add extra stages, steps, tasks, or conditions as you see fit for your use cases.
This is not an exhaustive method on how to structure the pipeline. These can get quite complex for different environments and use cases. For instance, you might include variables for different environments and conditions based on those. Some teams may opt to have no trigger and go for a manual pipeline with these extra conditions to control the deployment, etc.
Artifact stage
I prefer to construct an artifact at the moment of a merge into the main branch, allowing me to capture a snapshot of the Azure Bicep code at that specific point in time.
This approach ensures that the code you are deploying to production doesn’t inadvertently include additional merges that might occur between the actual deployment and the build phase.
Without this stage, there’s a risk that multiple merges happening in quick succession could lead to deploying several changes simultaneously, rather than managing each one individually.
The alternative would be for the pipeline to perform a repository checkout, which would bring in all current files from the main branch for deployment. These files might differ from what was planned for that particular pipeline deployment run, which is what we’re trying to avoid.
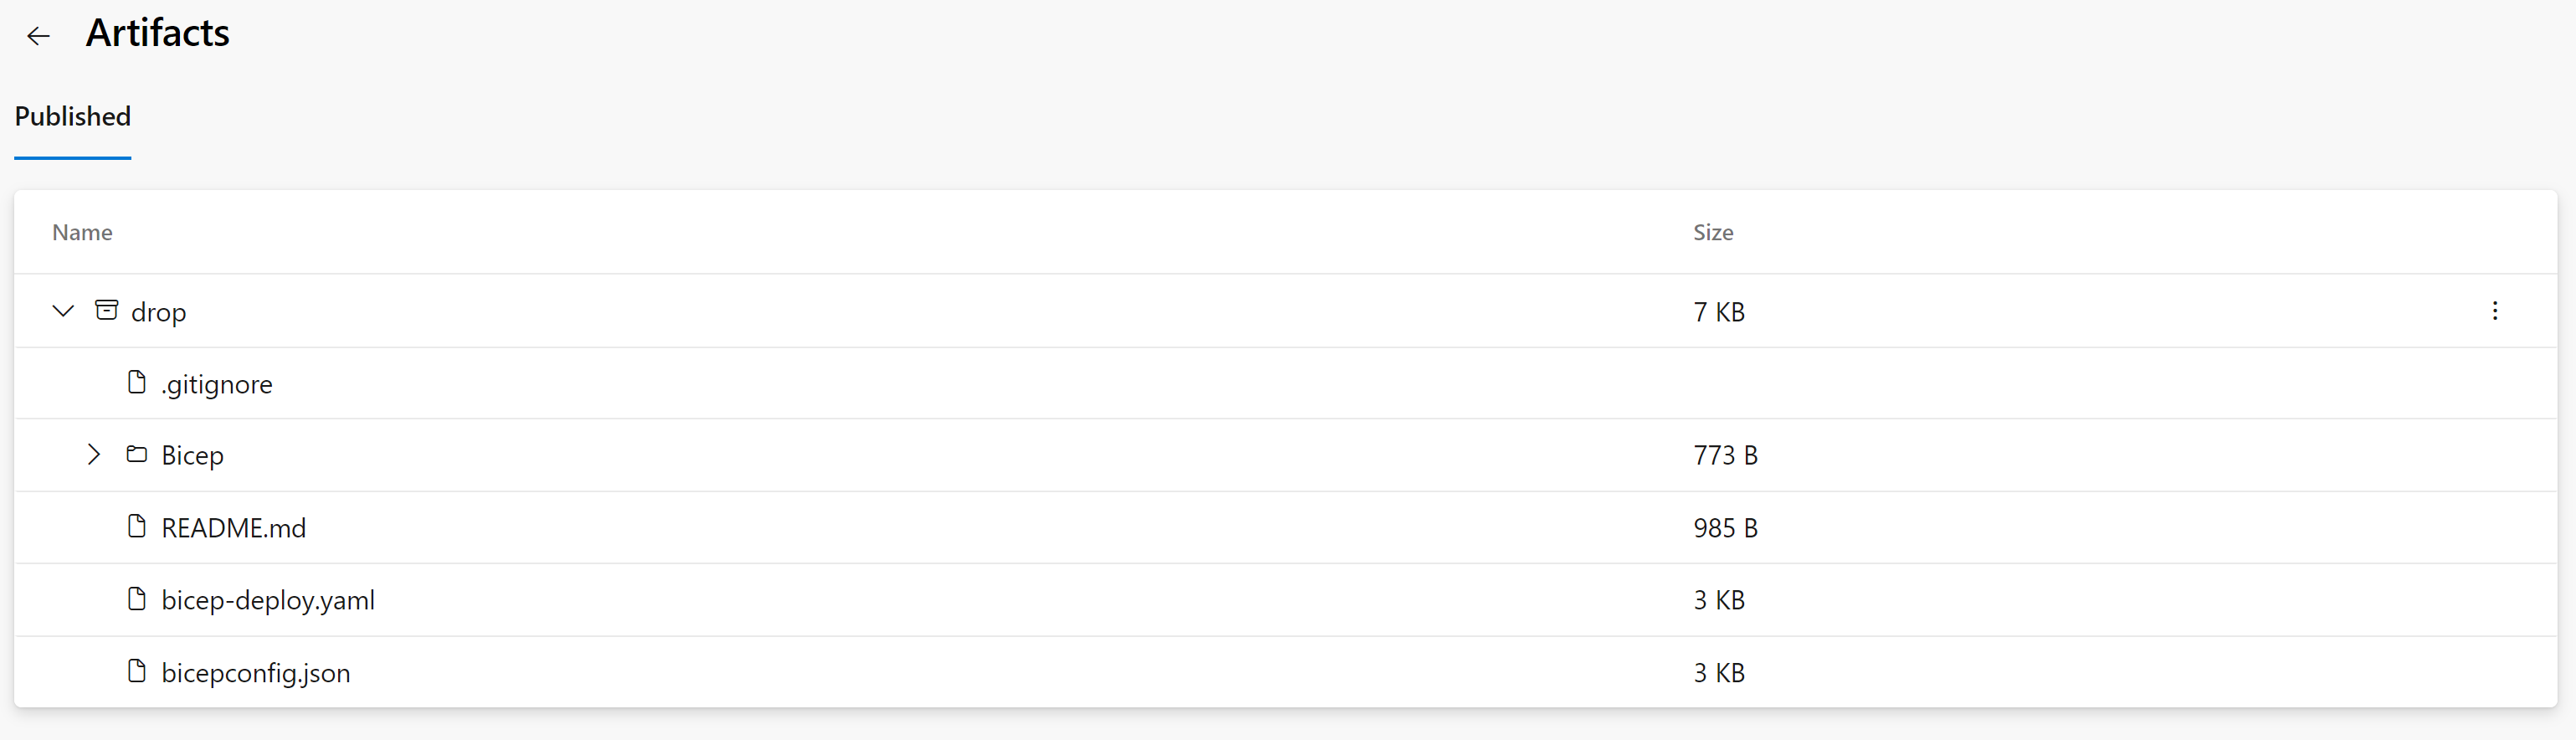
Once the build stage is completed, it will upload the contents as a pipeline artifact to a staging directory that can be used by subsequent stages. It’s worth noting that this process only copies the contents from the repository, as opposed to executing an actual ‘az bicep build’ command.
You even have the option to download the contents locally for review from the pipeline overview, by selecting ‘download artifacts’ next to the three-dot menu.
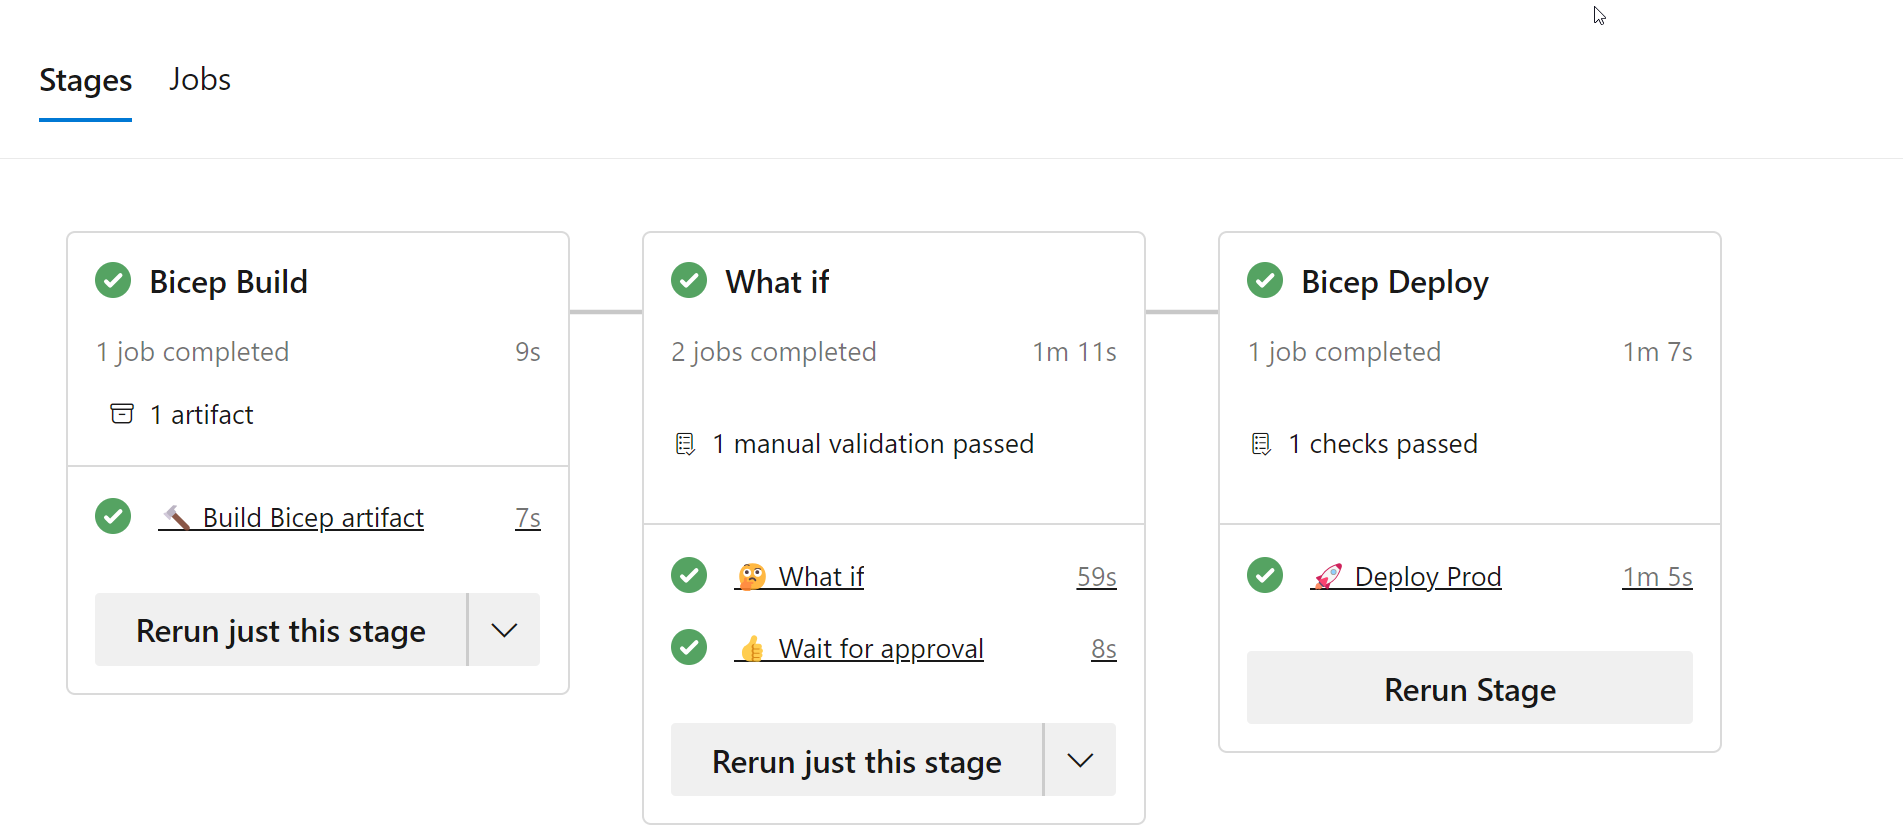
What if
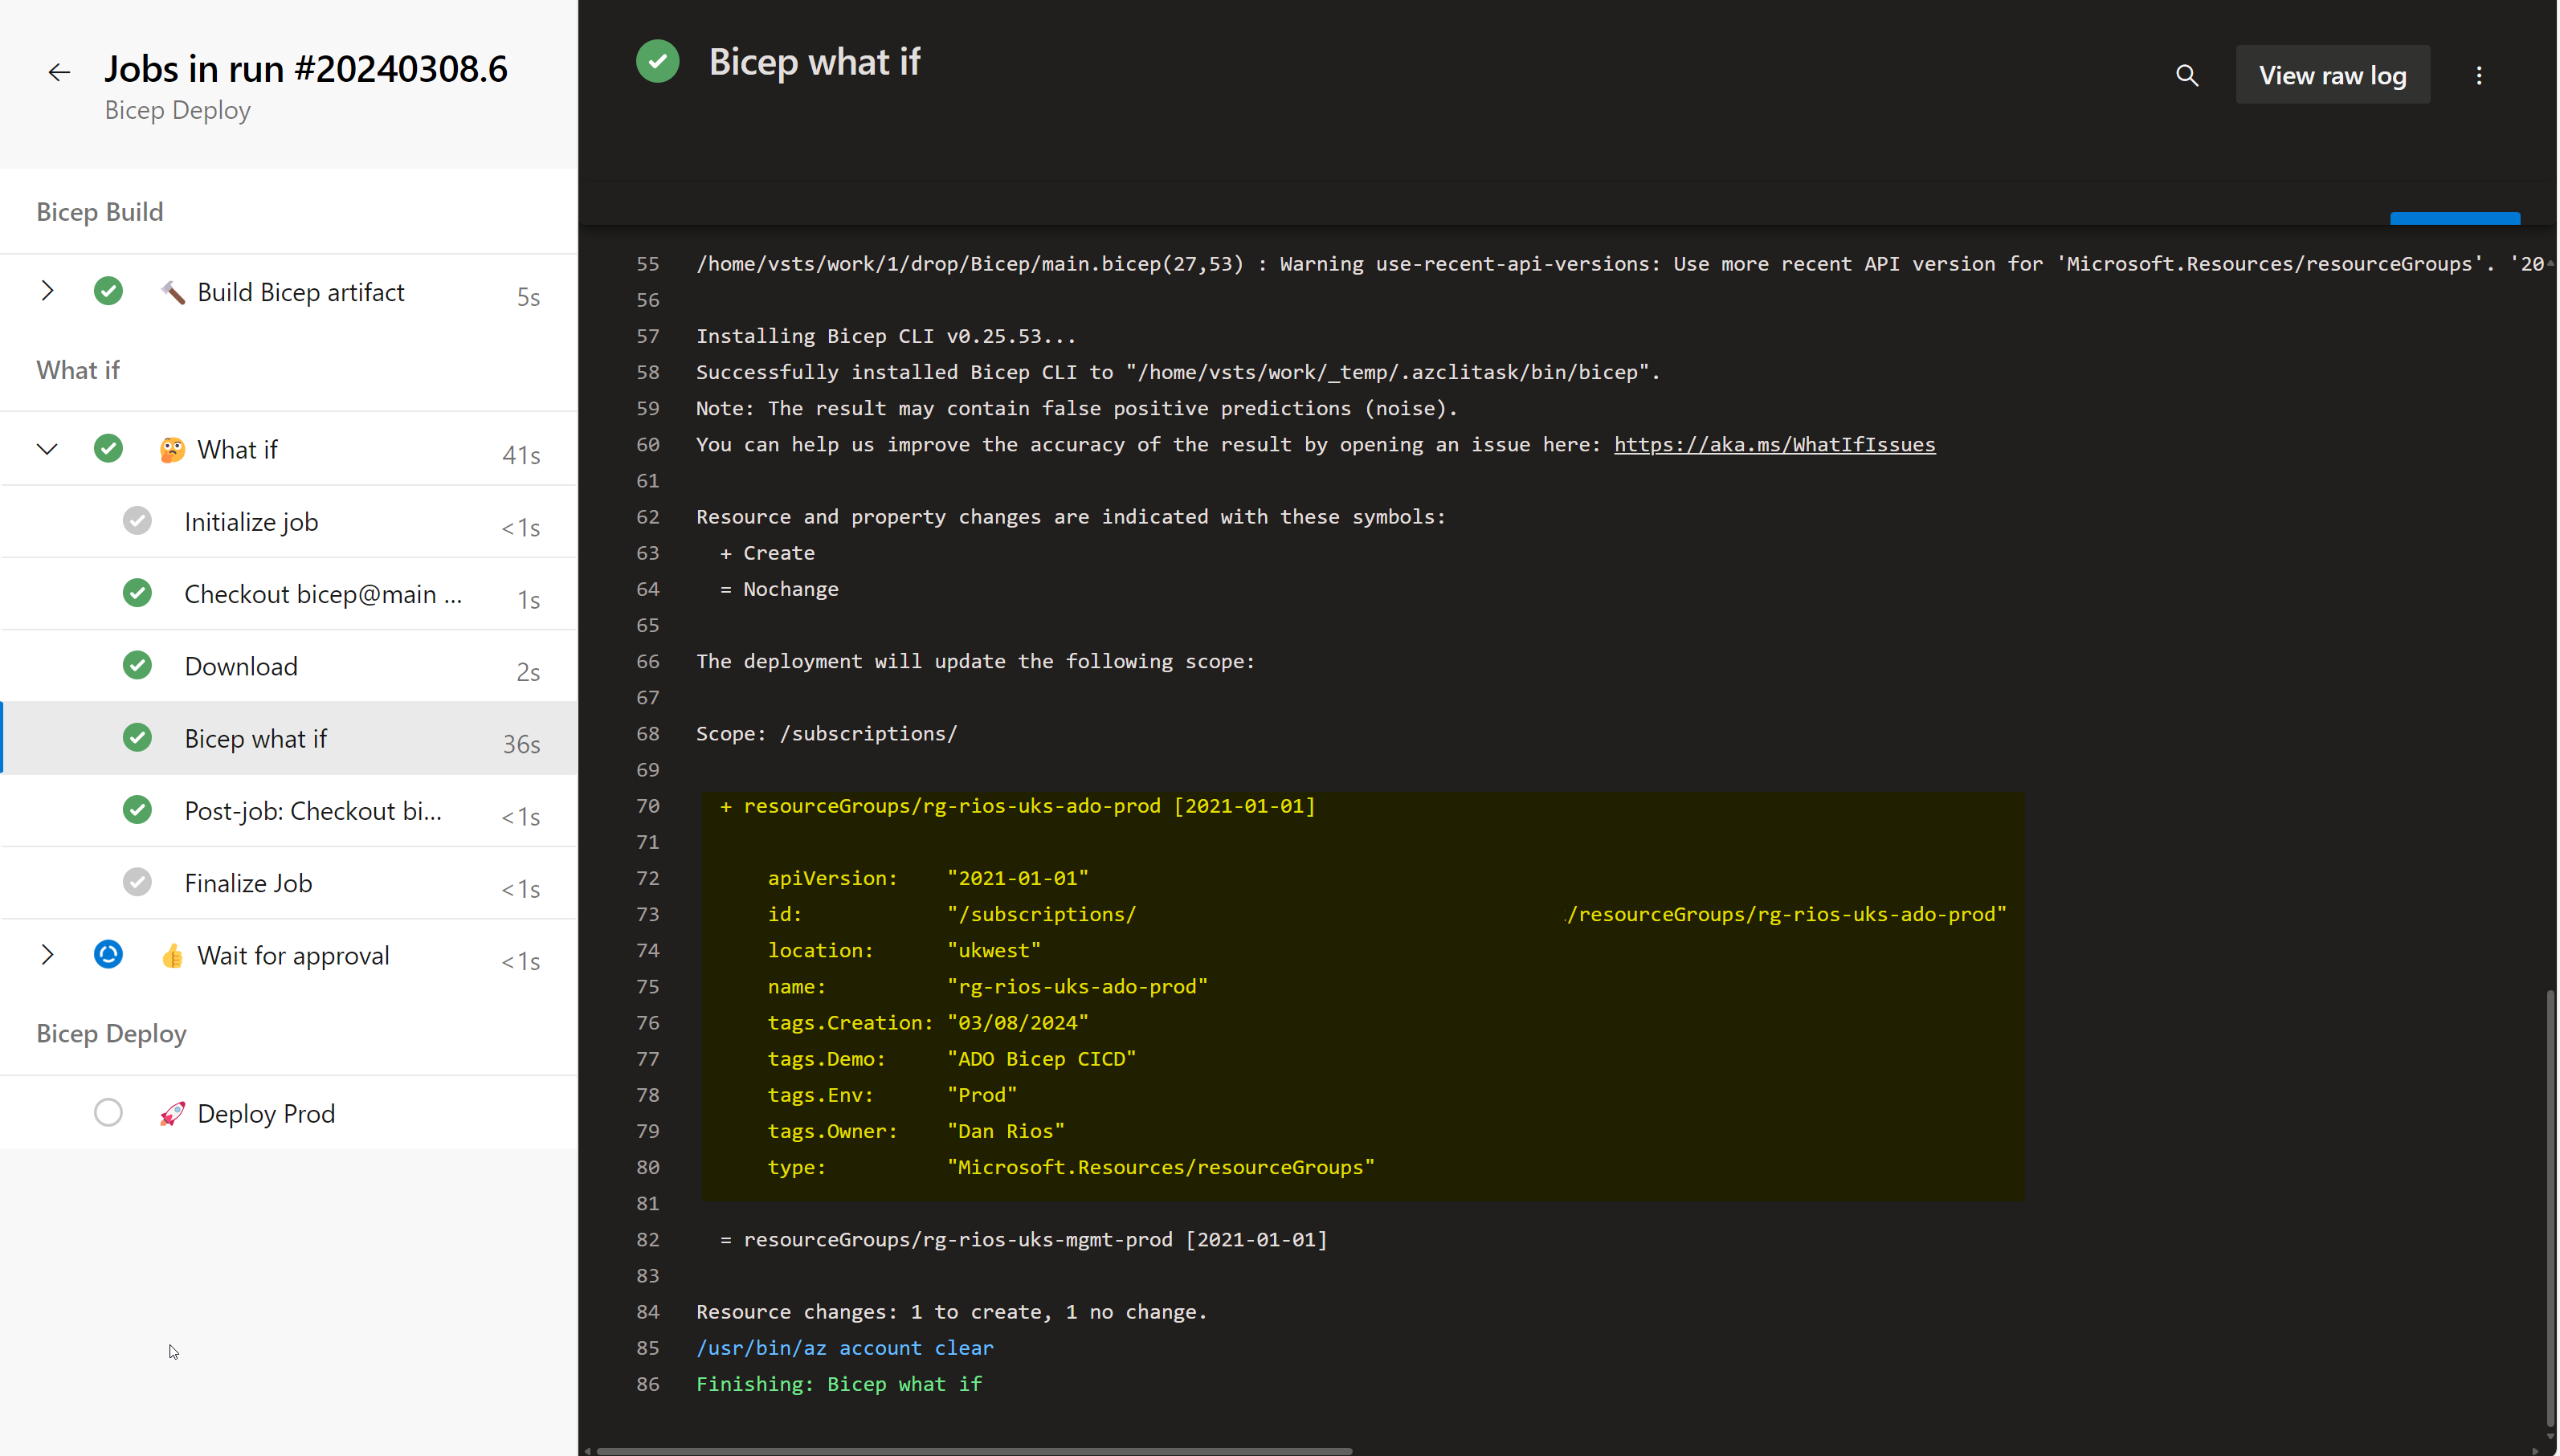
Before proceeding directly to a production deployment, I prefer to execute a ‘what-if’ function. This allows you to compare the differences between the current deployment state and your changes or additions to the Bicep template.
At this stage, I’ve included a manual stop point, allowing you to review the ‘what-if’ output and decide whether to proceed with or cancel the deployment. While some may argue this isn’t strictly necessary given that the next phase also includes a stop point, I prefer to include it as a precaution.
In my view, this approach allows technical teams to review the output. Then, you can let the actual deployment approval be a collaborative decision involving various stakeholders, some of whom may not need to be notified at this stage or fully understand the output results.

Before approving, you can go to the ‘Bicep what if’ task and review the output, in our case, a new Resource Group:
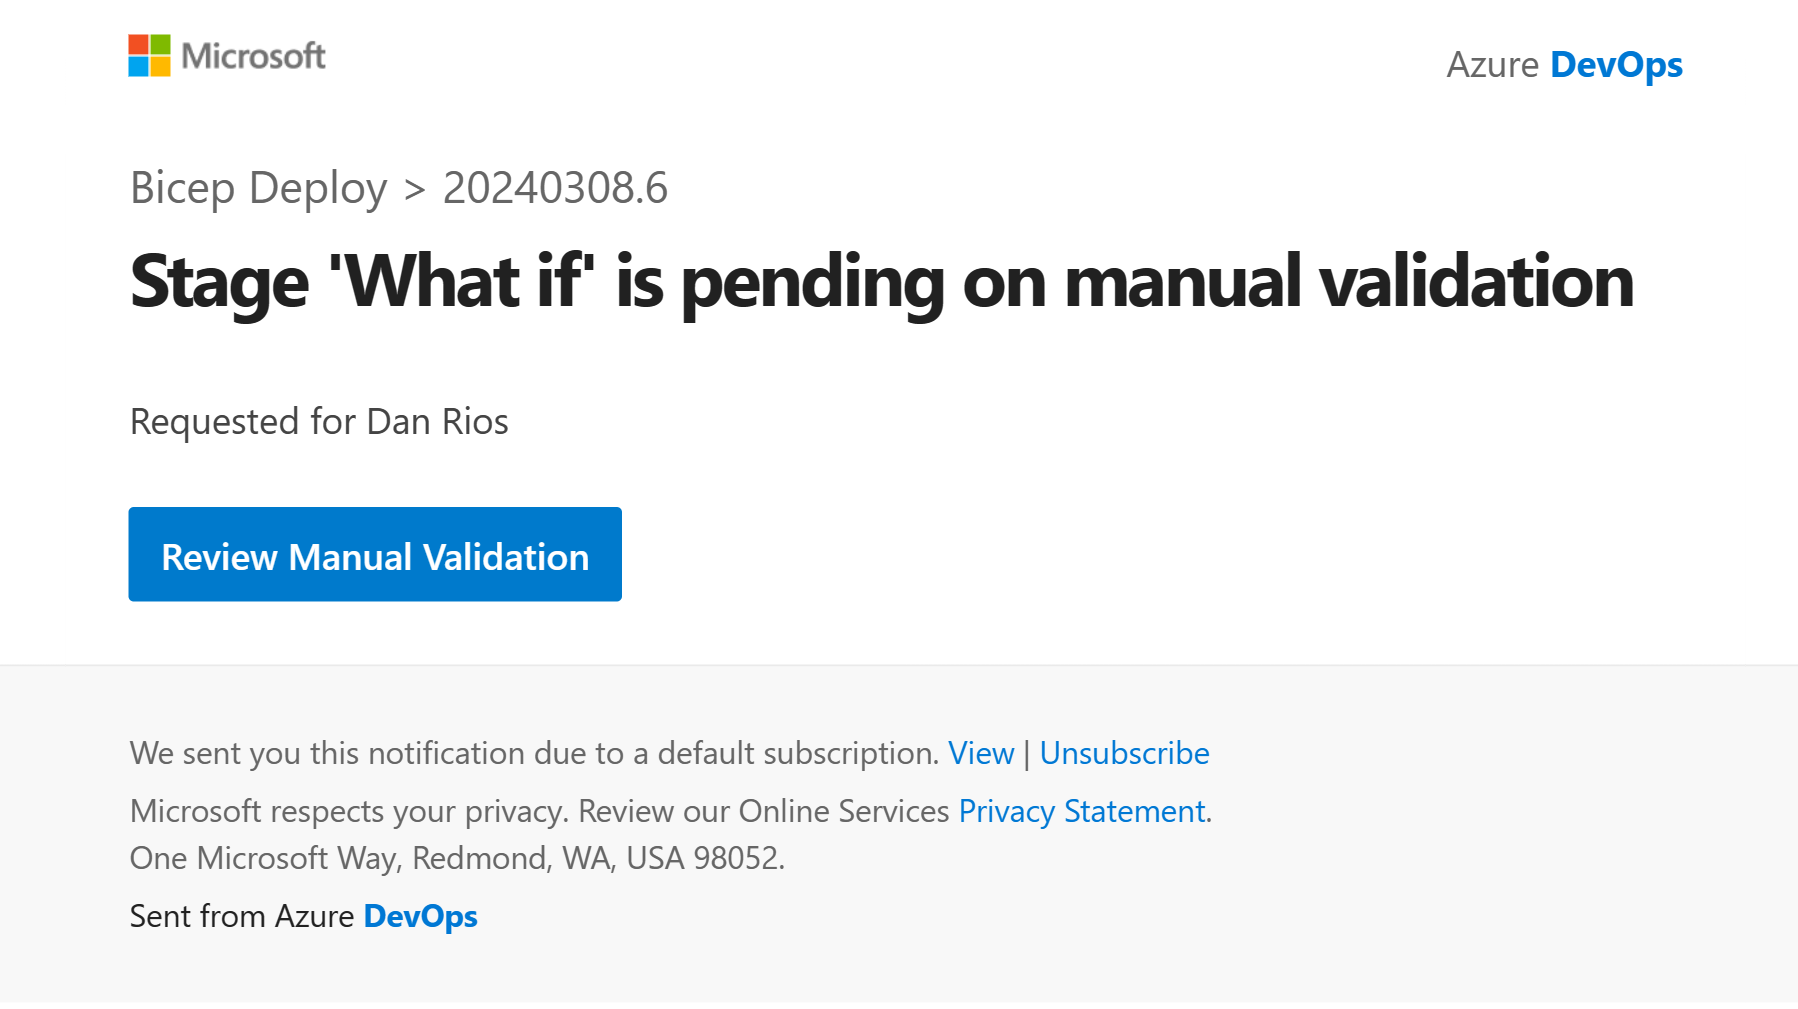
In addition to checking the output, by putting an email into the YAML we’re able to get notifications when a pipeline hits this manual validation stage:
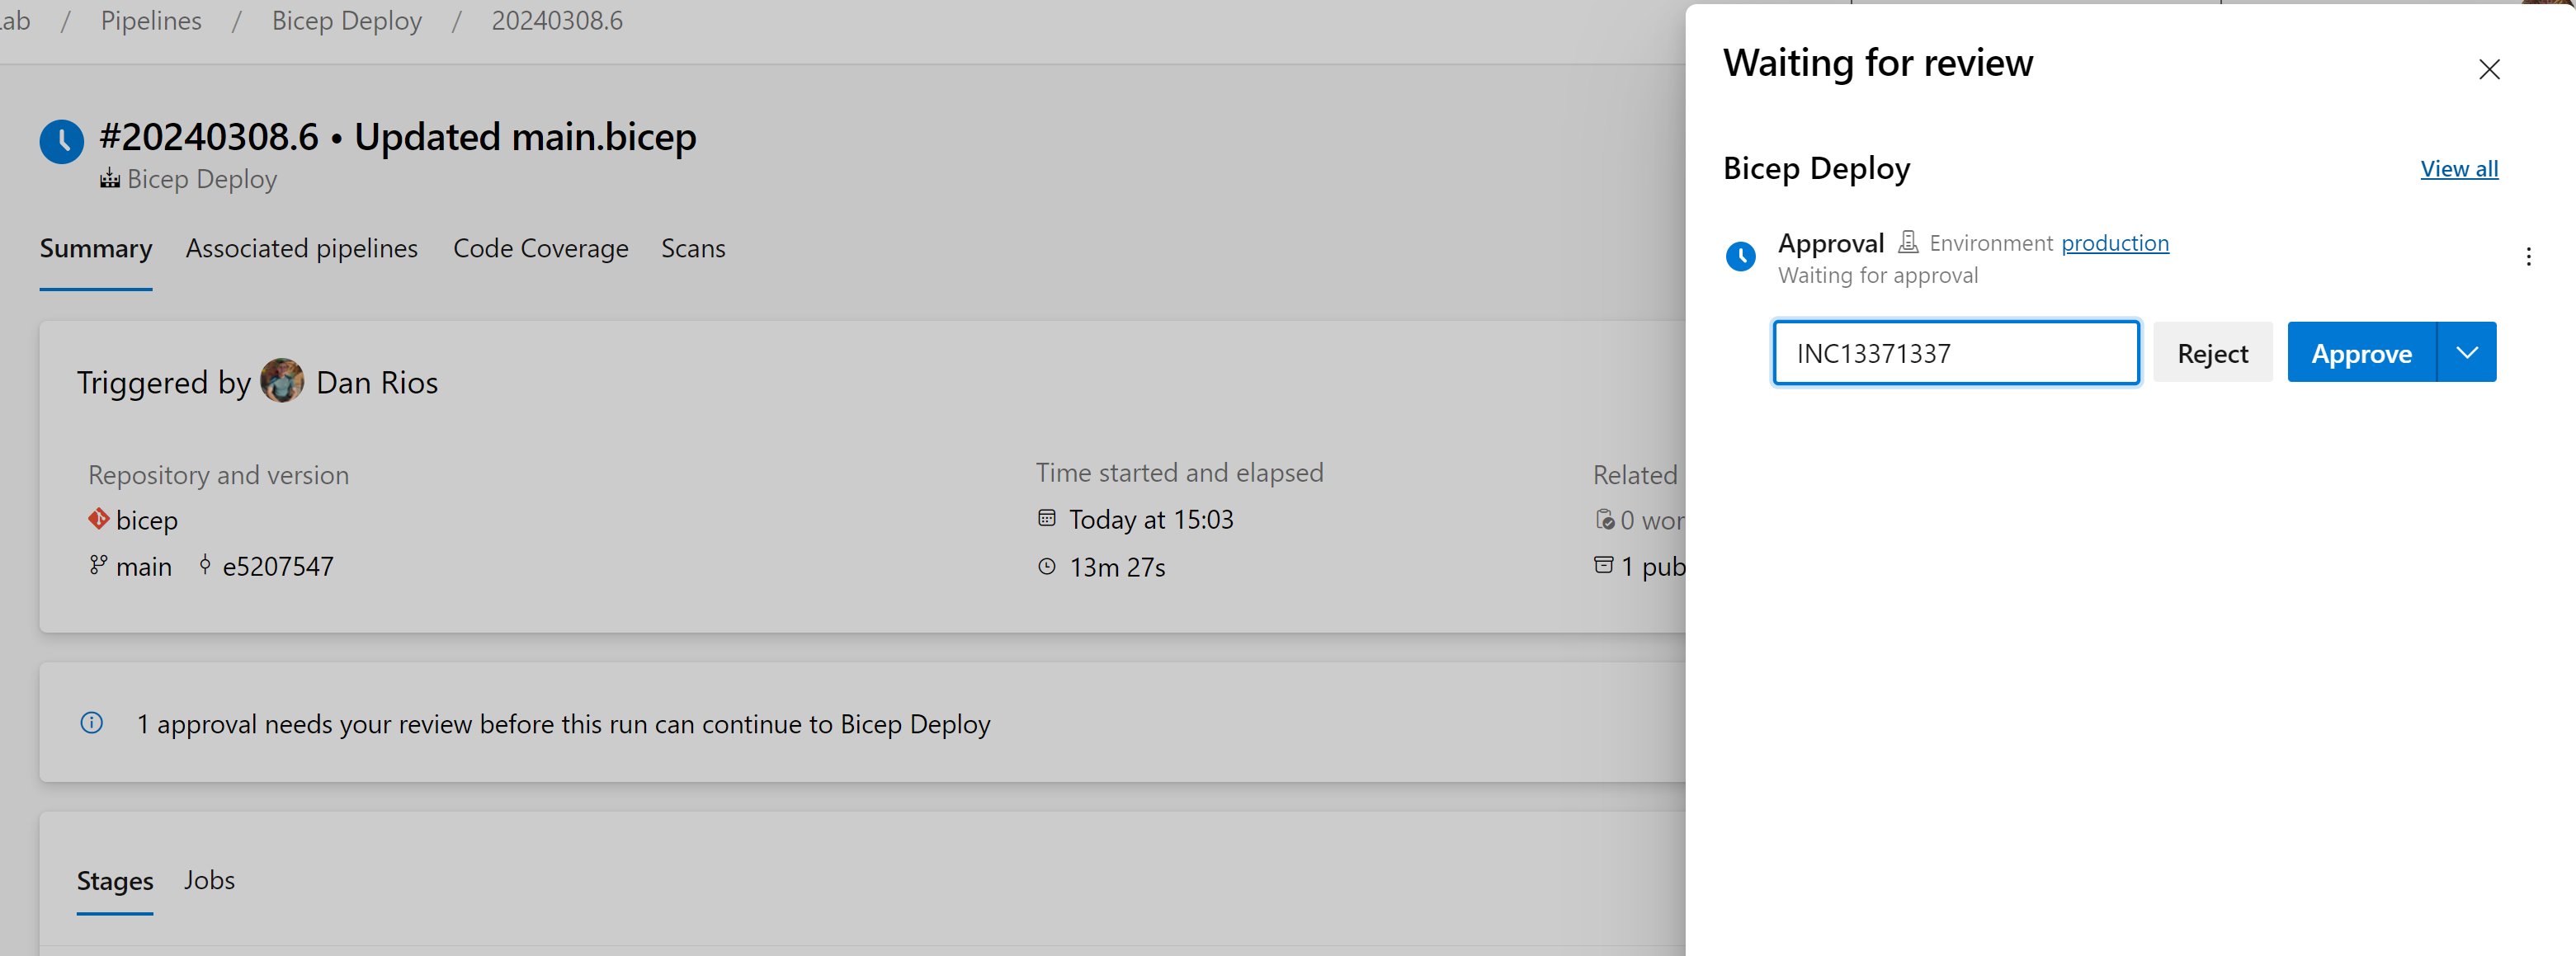
Deployment
Finally, we reach the deployment phase. This is where the environment, set up earlier, comes into play. It will prompt you for approval to deploy our code into the production subscription. If we’re satisfied and ready to proceed, you can click on ‘Review’ > ‘Approve’. Feel free to add a comment, such as a change or incident number, for example.
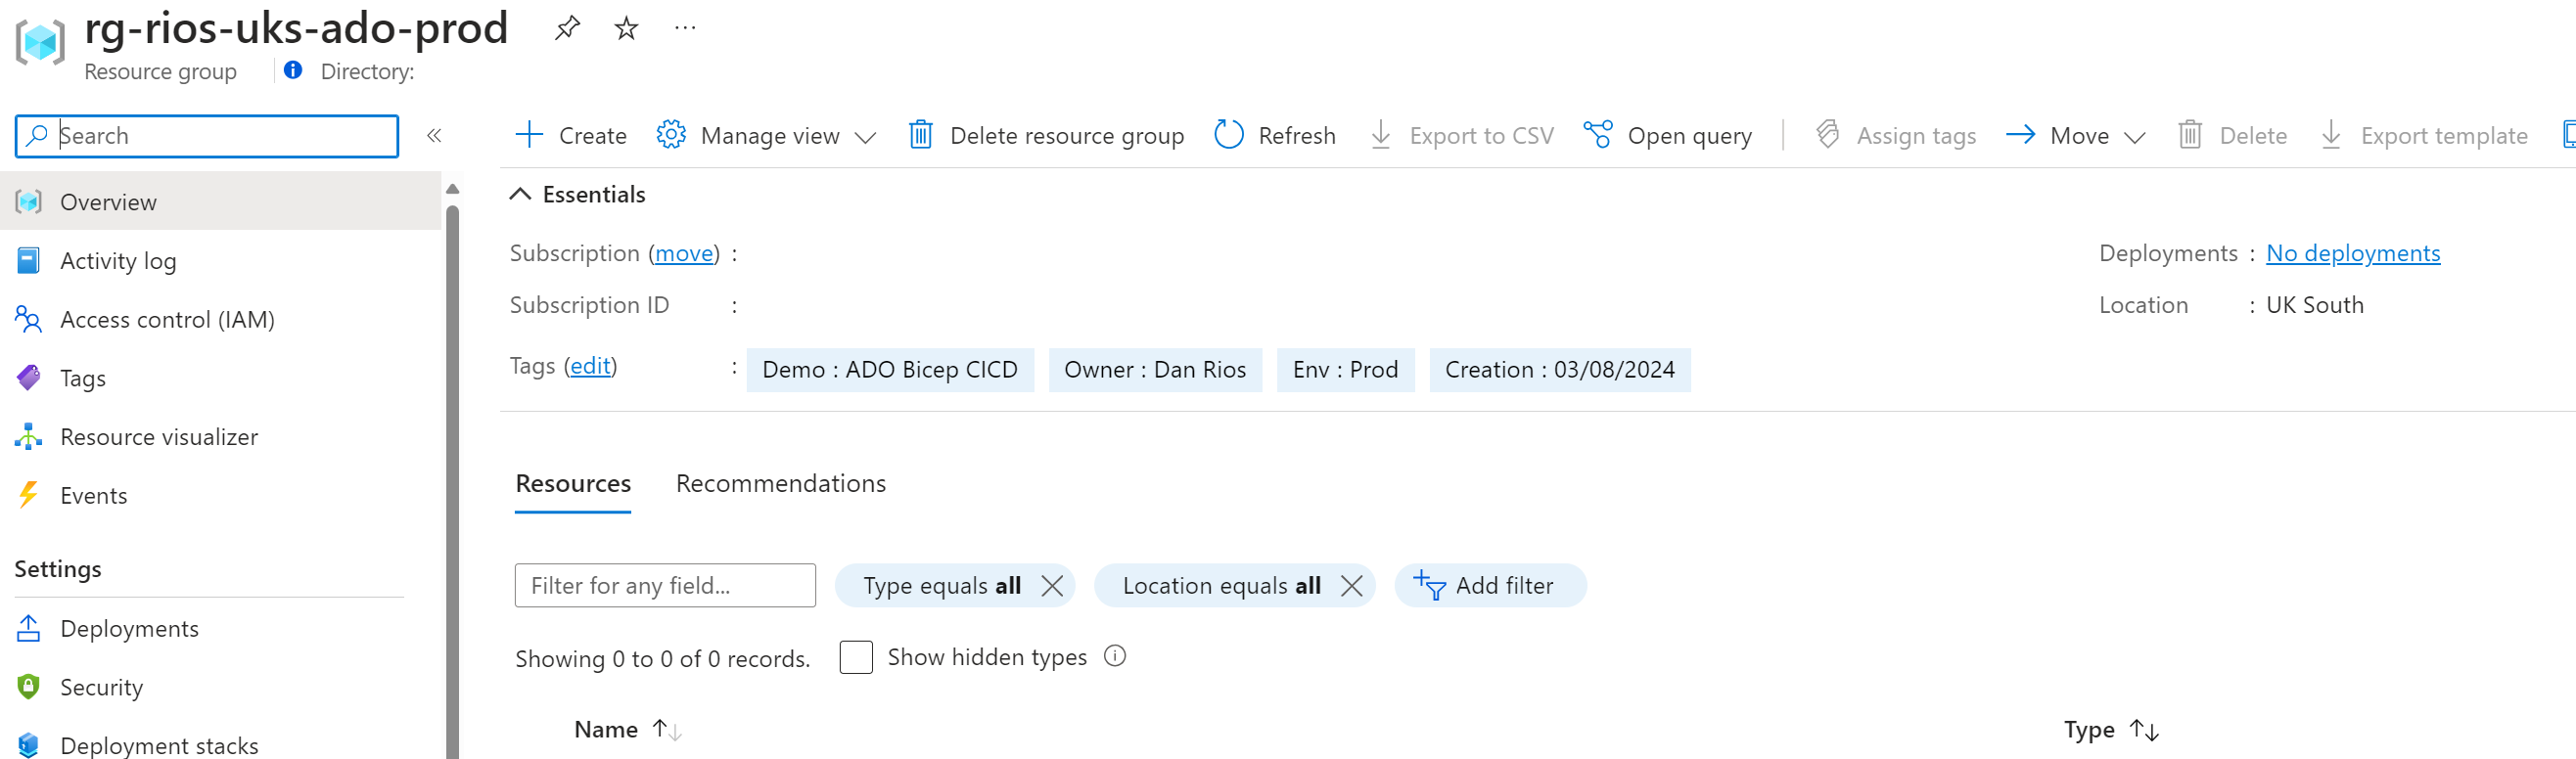
Then wait for the deployment to finish and we can review that our resource group was created as per the what-if plan.
And our resource group deployed to the subscription:
What about dev/test deployments?
Personally, I’m a strong advocate for feature branching and frequent merging of code into the main branch. This approach offers numerous benefits, including simplicity, ease of tracking, and continuous code testing, among others.
If you have a development Azure subscription and would like to deploy to it before merging into the main branch, I recommend setting up a pipeline that deploys to the dev/test subscription as part of a pull request (or as part of a commit to a remote branch). This pipeline can create a temporary resource group named after the PR number, which is automatically deleted once the deployment has completed. The pipeline can then report whether the deployment to Azure was successful or if it failed and requires attention before the pull request is reviewed.
This approach allows you to spin up a test deployment from your branch, helping you quickly assess whether your code is ready to go or requires further attention. These short-lived deployments are ephemeral and serve as a way to validate that your changes are production-ready before merging into the main branch. You can also run them against tools like PSRule to ensure your IaC is framework aligned, guard against misconfigurations and best practices.
While this topic is beyond the scope of this post, I’d be happy to delve deeper if there’s interest. It intersects with decisions regarding DevOps branching strategies and automated unit/integrated testing for your IaC – so do let me know in the blog comments!
In addition, please do checkout John Lokerse’s blog post on environmental variables which is very useful for additional environment deployments within your Azure DevOps pipelines: Work with environment variables in Azure Bicep – Azure Cloud | John Lokerse. This is especially useful once you build beyond a basic deployment method and become more advanced with your CI/CD capabailities.
What about Bicep build?
As I mentioned earlier, I’m not executing ‘az bicep build’ during the deployment phase. Instead, I believe it’s best practice to run the build and linting as part of the build validation when a pull request is created. This approach allows you to catch compile issues earlier in the CI/CD lifecycle.
By shifting left as much as possible, you can identify and remediate problems before you initiate deployment runs. Typically, I would incorporate this into the Azure DevOps build policy, which would then perform a build and lint of the Bicep code during a pull request.
Expanding for multi-subscription deployments
Using the above as a reference or starting point, how can you expand to deploy more than just a single template? Perhaps your team or organisation has multiple subscriptions, and you want to enhance or build upon the above for Azure Bicep CI/CD.
In my experience and opinion, it’s always beneficial to trigger pipelines based on specific folders within the repository. This approach allows you to target pipelines based on triggers specific to these folders only. The folders can represent your subscription names, each containing their corresponding Bicep templates and configurations for that environment.
Let me try to visualise the structure a bit to help illustrate my thinking – although it is not limited to this structure, the concept can be applied to your specific use case:
.
└── bicep/
    ├── modules/
    │   ├── keyvault.bicep
    │   └── tests/
    │       └── keyvault.tests.bicep
    ├── connectivity-sub/
    │   ├── main.bicep
    │   └── main.bicepparam
    ├── corp-sub/
    │   ├── main.bicep
    │   └── main.bicepparam
    ├── managaement-sub/
    │   ├── main.bicep
    │   └── main.bicepparam
    └── identity-sub/
        ├── main.bicep
└── main.bicepparamThis would be similar to the pipeline example I’ve shared earlier in my GitHub gist, and it might look something like this:
As you can see in the example above, you can trigger a deployment based on the repository subfolder (line 79). This subfolder contains the specific subscription’s template code, performs a ‘what-if’ operation, and then deploys.
parameters:
- name: env
  type: string
  default: 'dev'
  values:
  - dev
  - test
  - prod

  variables:
  - group: azure_service_connections # ADO library with each subscriptions service connection
  - name: azureConnection
  # sets the azureConnection var to the ADO library name aka service connection depending on the parameter selected
  ${{ if eq(lower(parameters['env']), 'dev') }}:
    value: $(SERVICE_CONNECTION_NAME)
  ${{ elseif eq(lower(parameters['env']), 'test') }}:
    value: $(SERVICE_CONNECTION_NAME_TEST)
  ${{ elseif eq(lower(parameters['env']), 'prod') }}:
    value: $(SERVICE_CONNECTION_NAME_PROD)

  - task: AzureCLI@2
    displayName: Deploy
    inputs:
      azureSubscription: $(azureConnection)
      scriptType: pscore
      scriptLocation: inlineScript
inlineScript: |Further reading & lab
If you’re interested in checking out the continuous integration side of Azure DevOps with Azure Bicep, I would recommend checking out my previous blog post on this subject: The ultimate Bicep validation pipeline guide: ADO Edition – Rios Engineer
Also Azure Bicep test files, using PSRule with a demo lab, can be found here: Bicepify/bicep-cicd-examples/module-tests-with-psrule at main · riosengineer/Bicepify (github.com) – Give it a star if you found it useful!
Conclusion
Hopefully, this was a useful walk-through for continuous deployment with Azure Bicep. There are quite a few different ways to approach this, including different Azure DevOps tasks, folder structures, and tooling options. But as a starting point, this blog should offer some insight to get running and customise for your own needs, including more complex scenarios.
Let me know in the comments how you approach this, and if there’s anything else you’d like me to cover.
Hi Dan,
Great blog and one I’m currently running with internally. A quick question for you from the What about dev/test deployments? part
If you have an .env file in your branches, how would you manage that in feature branches to ensure that the long standing development and main don’t merge environment variables?
Thanks
Thanks Andrew!
Good question, in my experience at least, I’ve tried to have a singular main file and make the bicepparam env specific so the template is agnostic as possible. Then in the pipelines I typically deploy in stages dev > test > prod where each stage grabs the env.bicepparam file and runs the main.bicep template. Of course, there are so many ways to do it, that’s just sort of how I’ve done it at a lot of gigs.
Is this for an application deployment infra, or more like an entire landing zone?
Dan
Ah that’s how you do it, I can see how that would work.
It’s aimed at application deployment infra, what I have is very similar, where I have the main.bicep and one main.bicepparam file, but then within the main.bicepparam file I call the environment variables, so for example param parEnableDiagnosticSettings = bool(readEnvironmentVariable(‘ENABLE_DIAGNOSTIC_SETTINGS’))
I just want to try and find a happy medium for this, but this is the one part I’m a little stuck on at the moment, suppose I could have different .env files which would work
Got you. I guess we are both doing the same thing with a different approach. I quite like how you have done it actually! I assume you read the env var from the YAML when pipeline runs (if you do use a pipeline to deploy). So if it’s dev, it reads that and will decide if it will enable/disable that property/object/feature etc. Nice.
I’m a big fan of merging to main little and often which helps these issues vs longer standing feature branches personally. If you have an .env in a long standing branch (feature/thing) and don’t want to overwrite when it merges to main then you probably have to have some sort of separate file. Although I can’t fully visualise the use case without seeing the repo. If you have it in GitHub (sanitised), I’m happy to check it out and bounce off with you.
That’s correct 🙂
So in talking to you, I think I’ve got the solution. .env files in environment folders, utilise parameters on the pipeline, like you have for the Service connection and just maintain the environment config in the .env files.
The answer for what I wanted was already in your blog 😀
I haven’t a sanitised version at the moment, but will be updating our main repo with what i’ve got above, so would be happy to share when I get there.
Thanks again Dan!
Sounds awesome. Glad it’s sorted!