At the time of writing, Microsoft does not have a native backup for Table contents in Azure.
The only method to backup table storage is to utilise the AzCopy utility. Specifically, version 7.3 as later versions do not support table storage service.
This guide will demonstrate how to backup table contents using an Azure Function with PowerShell to automate the process in Azure.
Create Azure Function
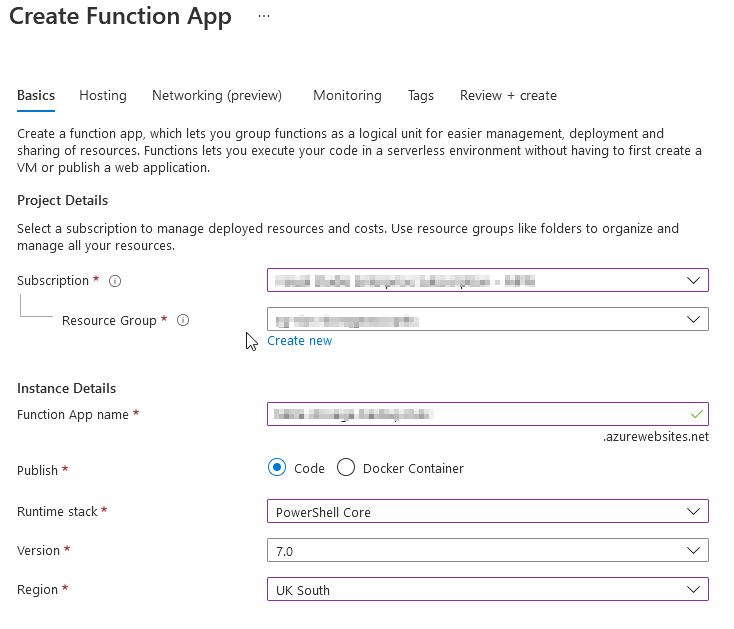
Firstly create an Azure Function with a runtime stack of PowerShell core. In my example I’m using a consumption plan type with a Windows OS. Additionally, note the storage account you’ll be using for later.
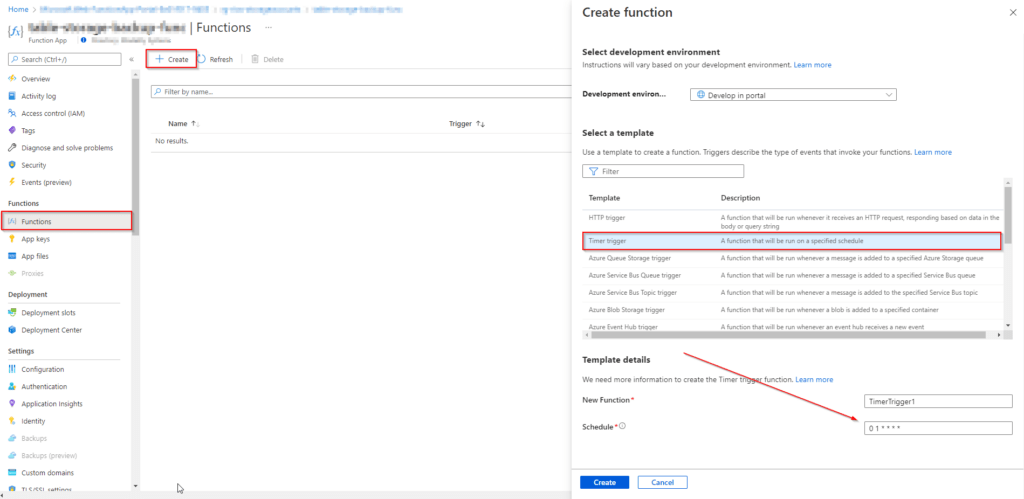
Secondly, lets setup our timer trigger for the app run schedule. The schedule runs from a cron expression. In my example it’s running at 1 AM every night.
Configure Managed Identity, App Settings & Requirements
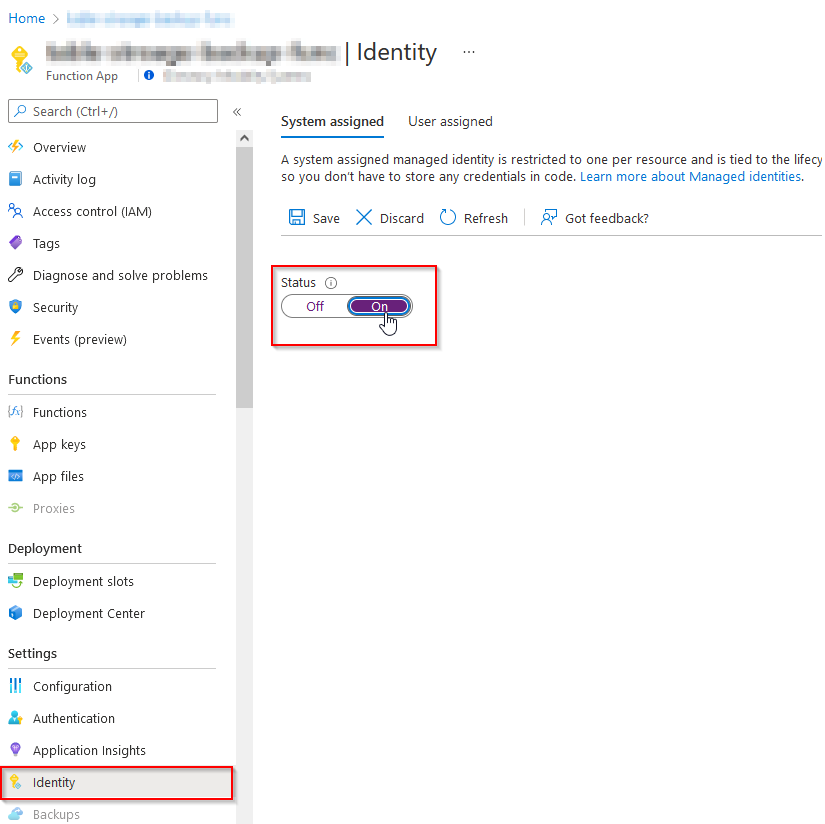
For best practise and security, lets turn on system managed identity. This eliminates the need for credentials when using PowerShell later in the app.
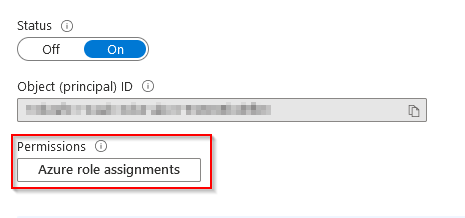
Secondly, lets assign the identity object contributor rights to the storage account. Under the ‘Identity’ settings in the function app select the Azure role assignments button. From here, select the storage account and contributor right.

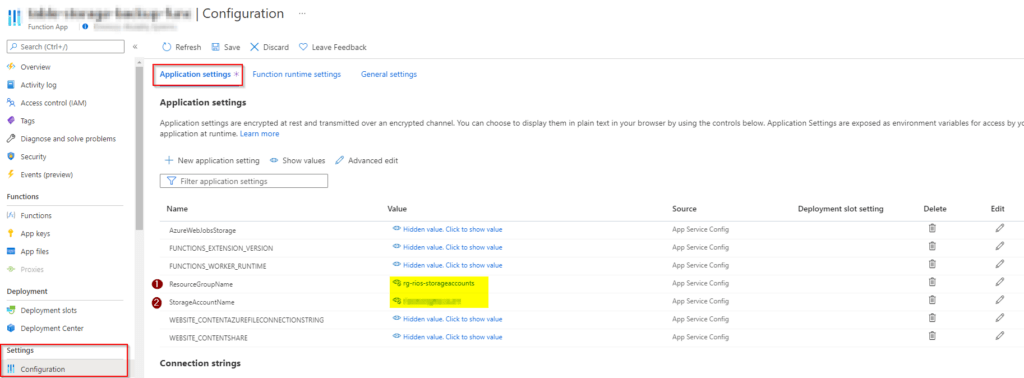
Next, add two new application settings for ResourceGroupName & StorageAccountName. We’ll use these in the PowerShell script as environment variables.
Lastly, lets make the ‘Az.Storage’ PS module available in the function by adding the following line to the App Files, under the Functions heading.
'Az.Storage' = '4.*'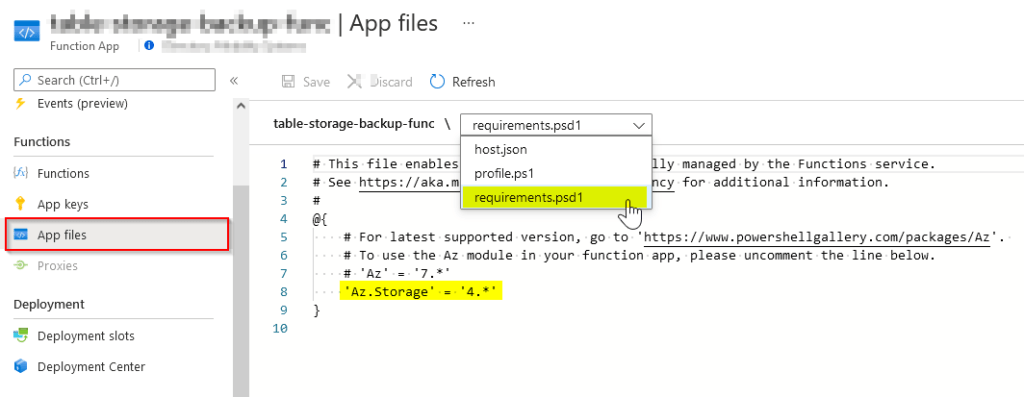
Deploying AzCopy to the Azure Function app
Now lets deploy AzCopy v7.3 to the Function. Download is available https://aka.ms/downloadazcopynet.
Download or open an FTP client to connect to the application with on your machine. I used FileZilla.
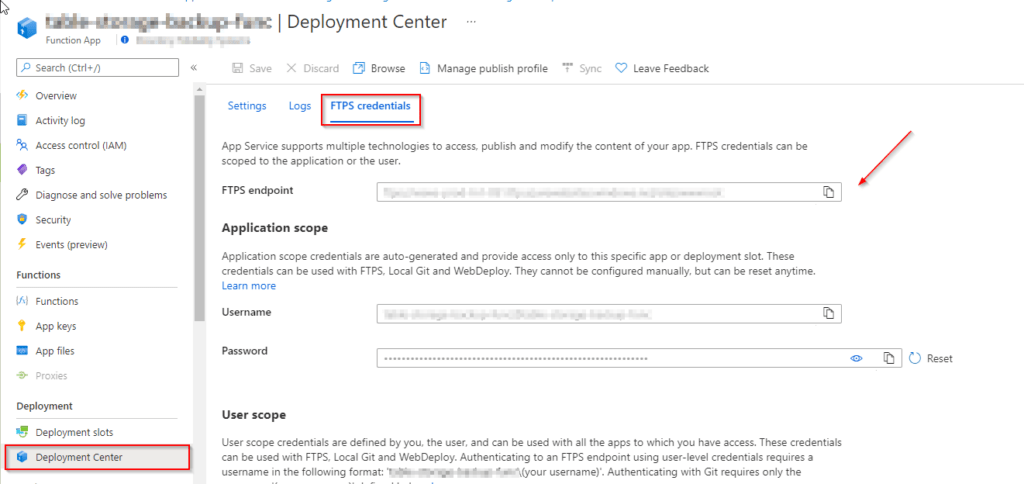
Then lets grab the FTP details which can be found in the Deployment Center of the app. Connect using these details.
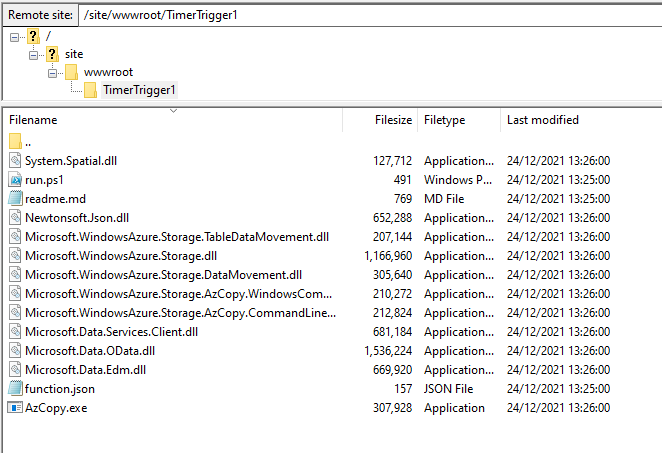
Drag and drop the AzCopy exectuable & the DLLs to the function.
PowerShell Script
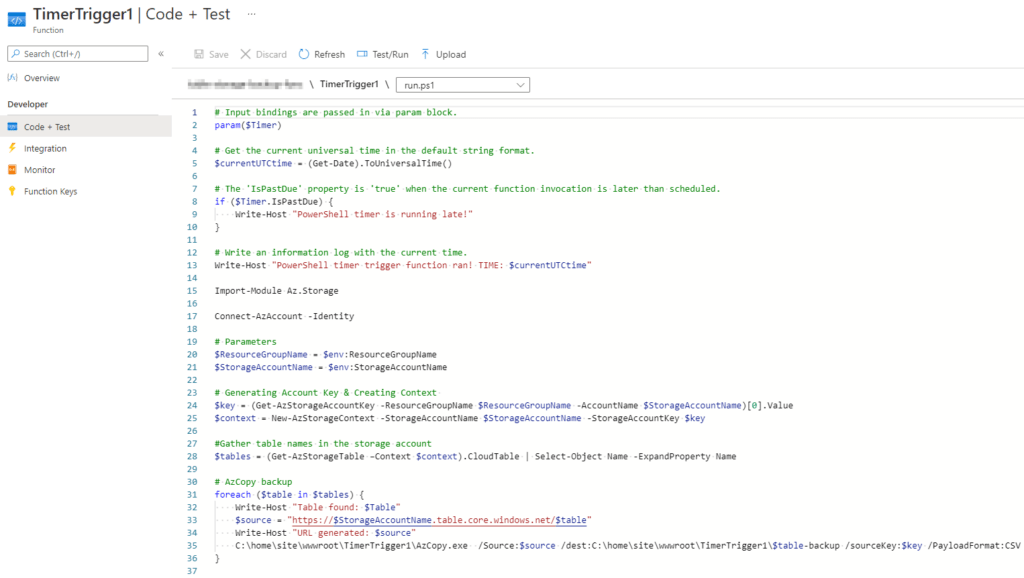
Here’s the PowerShell script I’ve put together to back up the table contents. It will also export to a CSV file within the FTP folder structure of the function app. Paste this into the function created, in my instance TimerTrigger1.
We are not specifying any credentials to connect to the AzAccount module.
That’s because the ‘-Identity’ switch will use the system managed identity setup from earlier to authenticate, which is why managed identities are great to use.
Navigate to Functions > TimerTrigger1 > Code + Test
Import-Module Az.Storage

Connect-AzAccount -Identity

# App Setting Parameters

$ResourceGroupName = $env:ResourceGroupName
$StorageAccountName = $env:StorageAccountName

# Generating Account Key & Creating Context

$key = (Get-AzStorageAccountKey -ResourceGroupName $ResourceGroupName -AccountName $StorageAccountName)[0].Value
$context = New-AzStorageContext -StorageAccountName $StorageAccountName -StorageAccountKey $key

# Gather table names in the storage account

$tables = (Get-AzStorageTable –Context $context).CloudTable | Select-Object Name -ExpandProperty Name

# AzCopy backup

foreach ($table in $tables) {
    Write-Host "Table found: $Table"
    $source = "https://$StorageAccountName.table.core.windows.net/$table"
    Write-Host "URL generated: $source"
    C:\home\site\wwwroot\TimerTrigger1\AzCopy.exe  /Source:$source /dest:C:\home\site\wwwroot\TimerTrigger1\$table-backup /sourceKey:$key /PayloadFormat:CSV
}
Testing the code & output
Next lets do a test run. This is done in the same area as Code + Test and the Azure portal will open a terminal window to show us what is happening in the run.
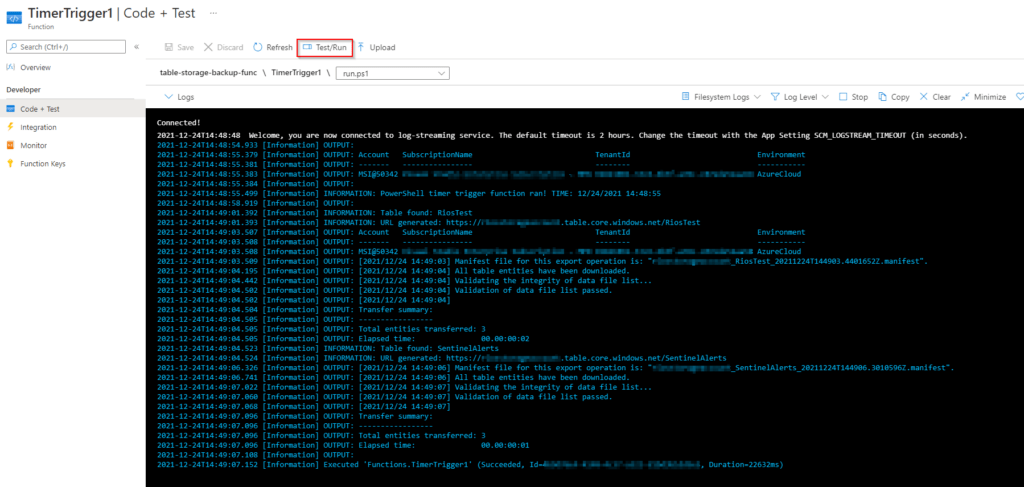
Awesome, looks to be working!
Now lets check the output CSV and it’s contents. The storage account setup from the Azure Function creation will contain a File share like below.
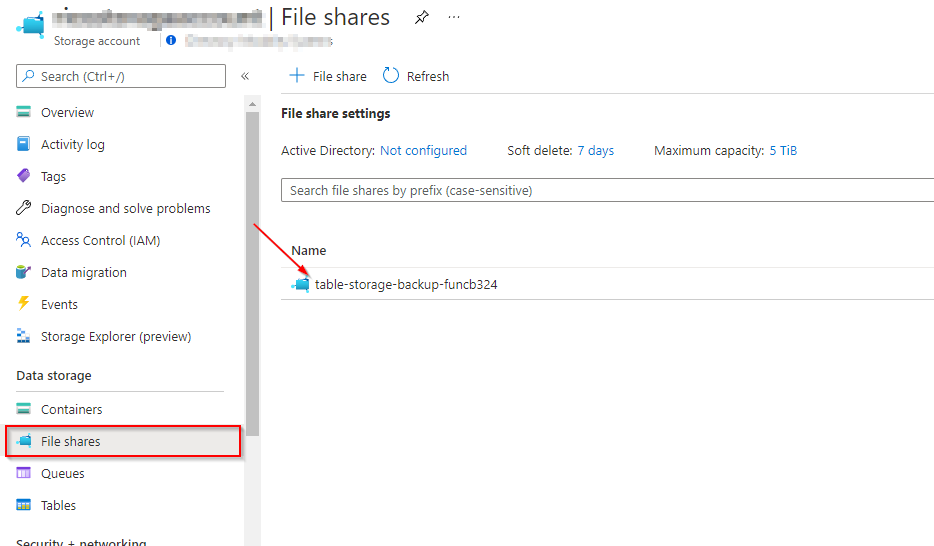
Then navigate through to find the folders of the table storages that have been copied in the Function execution.

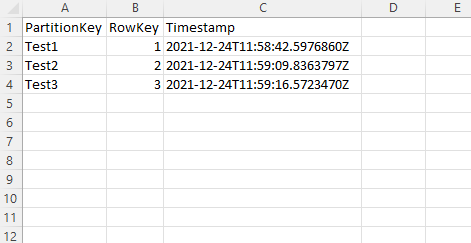
Finally, open the CSV to find our table contents, success! The function will now run on it’s specified schedule.
Summary
In my project I’ve exported to the Function app folder structure as it met my requirements. Their are alternative export locations that could be utilised, such as to an FTP server or VM share. You would just need to amend the script slightly and test.
If it wasn’t for relying on AzCopy I would have opted for Azure Automation Runbooks for this. I found the FTP upload easier to upload the required executable and DLLs for AzCopy.
Lastly, there’s a few ways to achieve table storage backups/copies, for example, running this script via a scheduled task on a server or desktop machine instead. Although, this is a great way to showcase how Azure Functions can be a great way of serverless computing.
Troubleshooting
- If the Account/Subscription columns are blank on the Connect-AzAccount -Identity terminal output then verify your managed identity access is correct.
- AzCopy execution issues may be due to missing DLLs. Verify they have all been copied to the function.
- Restart the Function app if the terminal output starts to mention memory exhaustion issues and retry.
i get an error saying TLS version of the connection is not supported by the storage account. Can you please help with how to circumvent this.
Hi Sneha.
In the storage account, under Settings – Configuration there is a minimum TLS version that is set. There is also a minimum TLS version set on the function app located under Settings – Configuration – General settings. May be review these and re-try the connectivity.
both function app and storage account are at minimum tls of 1.2. i googled and found out that azcopy 7.3 was built using .NET 4.5 and uses tls 1 by default .Setting TLS using
$TLS12Protocol = [System.Net.SecurityProtocolType] ‘Tls12’
[System.Net.ServicePointManager]::SecurityProtocol = $TLS12Protocol
did not help
Instead what was needed was to create and upload to function app an Azcopy.exe.config with following setting :
and the error went away 🙂
I didn’t come across this at the time when creating the article but that’s good to know. Thank you for sharing the resolution.
Dan